Magazine Retouch (Moire Pattern Removal)
When scanning images from printed materials, such as books or magazines, a moiré
pattern is frequently created. Moire is the phenomenon we see when two screens
are sandwiched together. In the case of scanning, an electronic screen is generated
by the scanner and the image itself has a screen of halftone dots that are appied
in the printing process. In order to get rid of that moiré you will most
likely have to sacrifice some image sharpness. This exercise will offer some
strategies for reducing moire and some additional techniques for image restoration.
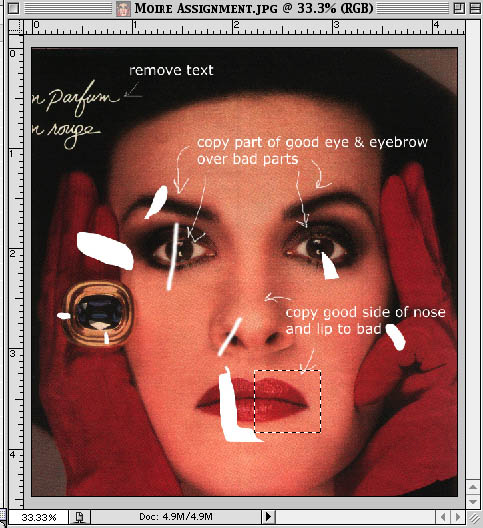
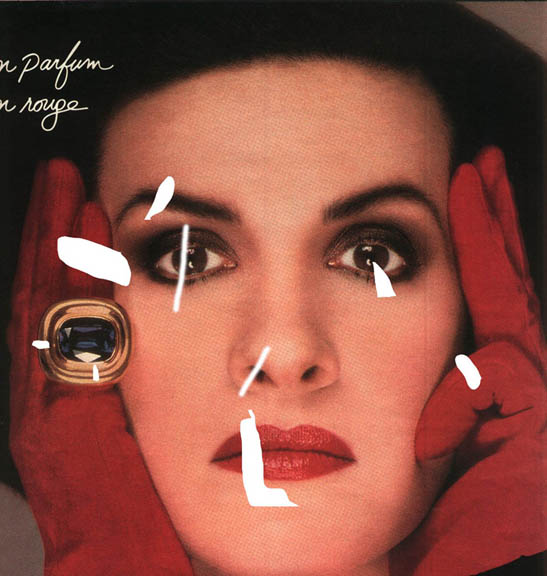
The goal of this exercise it to remove as much of the moiré as possible
and then retouch the flawed parts of the image using selection, copy-paste and
clone/healing brush work.
1. The Magazine Retouch file is available in the Course Documents page in Blackboard.
Copy the file to your computer to get started. You can also download
the starting file here.
2. First go to Image>Image Size to view the size and resolution
of the file. You should also go to Image>Adjustments and check the Levels
for any tonal range adjustments that are needed.
3. Now remove the moiré. You may want to try the despeckle filter on
the full image to start with. If the moire still is significant (zoom in to
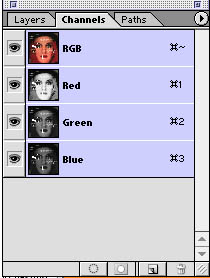
see the pattern better) select the channel mode.
The moiré will appear in varying degrees in each channel. One technique
is to remove as much moiré as possible from each individual color channel.
Start with whichever channel looks the worst (usually the green and the blue).
Check the RGB (all channels visible) as you go. Despeckling is actually a type
of blur so eventually your image will become soft and out of focus if you use
it too much. The advantage of the channel technique is that you can remove the
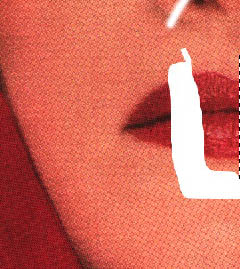
moire from the worst offending channel and still retain a sharp image. The enlargement
above shows the moire pattern before any repairs are made...have you seen this
pattern on other scanned images?
Channel Palette shown below
4. a. Despeckle - Filter/Noise/Despeckle. Repeat until most or all of
the moiré is eliminated. [some people use Filter/Blur/Gaussian Blur first.
I like Despeckle better.]
b. Unsharp Mask (this actually sharpens the image). Try 50% up to
100%.
c. Repeat for each channel until most of the moiré is eliminated.
5. Retouch the image using rubber stamp or healing tool and compositing techniques
such as selecting a similar area and pasting it over a problem area.
6. Use the Smudge tool sparingly - it alters the texture.
7. Save your file as a jpeg and send to me by the end of our work week.