AP Divs |
An "AP Div Tag" is a relatively new term for an HTML object that was formally called "layer". This feature keeps you from having to deal with and navigate around the restrictions of table grids. The Divs are coded as div tags based on CSS Positioning.
They function like independent cells of content. They can be placed anywhere on the page. They can overlap unless you prevent them from doing so. They can be animated and have dynamic content. They are GREAT!
The only thing is that older browsers, even sometimes new versions still misread or even disregard them.Understanding AP Divs
In Dreamweaver, you can use AP Divs to lay out your page. You can place AP Divs in front and back of each other, hide some AP Divs while showing others, and move AP Divs across the screen. You can place a background image in one Element, then place a second one, containing text with a transparent background, on top.AP Divs provide a great deal of flexibility in placing content. However, site visitors with older web browsers might have trouble viewing them. To ensure that everyone can view your web page, you can design your page layout using AP Divs, and then convert the AP Divs back to tables. For more information, see Converting AP Divs to tables in the Dreamweaver Help section. If your audience is likely to be using any recent browser, however, you can design layouts entirely with AP Divs, without converting them to tables.
However it still seems to be a goal to develop AP Divs as a consistent way of building Web content and therefore it is good to understand them. They also provide one powerful feature, which is to convert a page based on AP Divs into a page based on a table. I will explain this more later. This feature is so handy that you might start using it each time you layout your page.
How to create AP Divs
In the Layout category of the Insert bar, click the Draw AP Div button ( Use the Alt text to find it).
In the Document window’s Design view, drag to draw a single AP Div. After you create an AP Div, you can add content to it by simply placing your insertion point in the AP Div, and then adding content just as you would add content to a cell.
The AP Divs Panel
Open the AP Divs Panel: Window/AP Divs.
The panel displays a list of all the AP Div tags placed on the page. Each one is numbered.How to prevent overlaps
View the checkbox called "prevent overlaps". If you check it you will not be able to position Divs on top of each other. When you want to convert your Divs to a table this needs to be checked.
Stacking order
The Stacking order describes which Element sits on top and which on the bottom. You might be familiar with such a concept from using layers in Photoshop, or arranging objects in front or back in Illustrator and Flash. If you allow your Divs to overlap you will see certain ones while others are partially hidden behind them. The stacking order can be changed by dragging the respective AP Div up or down the list in the AP Divs Panel.
How to select, move, delete and define AP Divs
SELECT:
Click on the AP Element in your file window or select the Element vie the AP Divs Palette.
A blue border signifies that the Element is currently selected.
Now it's properties are displayed and can be edited in the Properties Inspector.
MOVE:
Just select the Element in the document . If you selected to prevent overlaps in the AP Divs Palette
you cannot move one Element on top of the other.DELETE:
Select the Element in the file window or in the AP Divs Panel and delete.DEFINE:
You can create your layout using AP Divs. In the Properties Inspector you have options to define AP Divs in regards to their background and border colors. You can also apply background images.
They can contain text and images or just color. They can not be combined with tables.Converting between AP Divs and tables
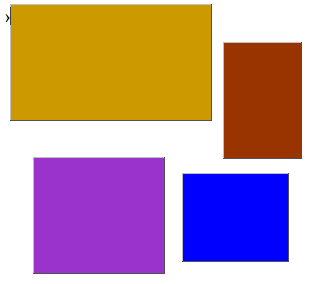
You can create your layout using AP Divs. AP Divs can have different background and border colors. They can contain text and images. Here is an example of a random layout of colored AP Divs:

You can convert the AP Divs to tables so that your layout can be viewed in older browsers.
Before you convert to tables, make sure AP Divs do not overlap by checking the bow "prevent overlaps" in the AP Divs Panel.
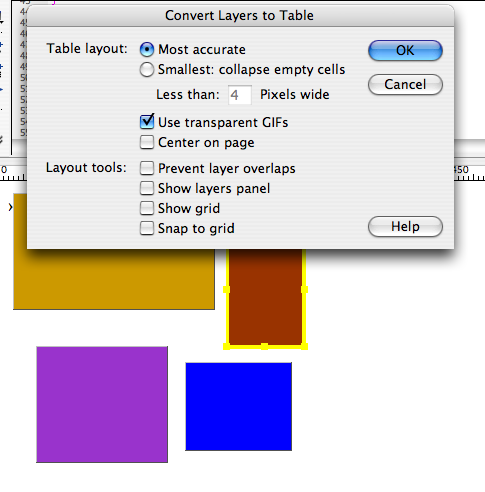
The image below displays the menu that pops up when you choose to convert your AP Divs:
This feature not only allows you to place content freely on your page but also to create
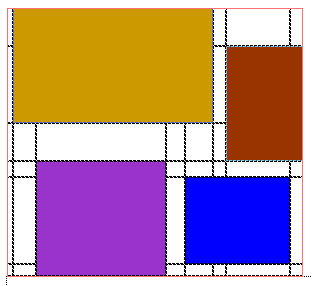
very complex layouts. And this is how a table would look based on the previous AP Divs-layout:

This feature can be handy but also can create very complicated tables with lots of empty cells.
It is suggested to use it mindfully and only when necessary.To convert AP Divs to a table:
- Select Modify > Convert > AP Divs to Table.
The Convert AP Divs to Tables dialog box appears. - Select the desired options.
For more information, see Setting the Convert AP Divs to Table dialog box options. - Click OK.
The AP Divs are converted to a table.
To convert tables to AP Divs:
- Select Modify > Convert > Tables to AP Divs.
The Convert Tables to AP Divs dialog box appears. - Select the desired options.
For more information, see Setting the Convert Tables to AP Divs dialog box options. - Click OK.
The tables are converted to AP Divs. Empty cells are not converted to AP Divs unless they have background colors.
NOTE:Page Divs that were outside of tables are also placed in AP Divs.
