| Low Budget Photogrammetry: Using PhotoScan and a Cell Phone to Generate 3D Models | |
|
| |
|
Matthew De Parsia American River College, Geography 350: Data Acquisition in GIS; Fall 2016 | |
|
| |
|
Abstract PhotoScan photogrammetry software was used to produce an orthophoto and a three-dimensional model of the study area near the Guy West Bridge in Sacramento, California. Imagery was captured using an LG V10 cell phone using the onboard GPS to tag photographs with locations. PhotoScan was used to find matching points between overlapping photographs and to georeference the resulting imagery using location data stored within the image EXIF data and coordinates recorded at six ground control points in the study area. This process was able to produce useful three dimensional models but the orthophotograph results were subpar. Improving the quality of the source images and the GPS measurements recorded at ground control points would likely lead to better results | |
|
| |
|
Introduction The acquisition of elevation data and orthophotography has traditionally been a high cost endeavor due to the requirement for expensive aerial surveys and highly trained photogrammetrists (Westoby et al., 2012). Structure-from-motion photogrammetry software, such as PhotoScan by Agisoft, is a relatively inexpensive and highly accessible alternative to traditional photogrammetry workflows. It is now possible to create three dimensional models, orthorectified photos, and digital elevation models with nothing more than a cell phone and a personal computer. This paper will explore using PhotoScan and a cell phone to generate an orthorectified image of part of the American River Parkway in Sacramento, California. | |
|
| |
|
Background Several photogrammetry software options were considered for this project including; Photosynth, Open Drone Map, PhotoScan, Drone2Map, and OneButton. PhotoScan was chosen due to a combination of tutorial support, cost (free, fully featured 30 day trial), integration of spatial data, and ease of use. The American River Parkway near the Guy West Bridge was chosen as a study area due to ease of access and suitably varied terrain with changes in elevation and vegetation (Figure 1). The Guy West Bridge made it possible to collect a series of photos along a transect at altitude in order to simulate the flight path of a drone. | |
|
| |
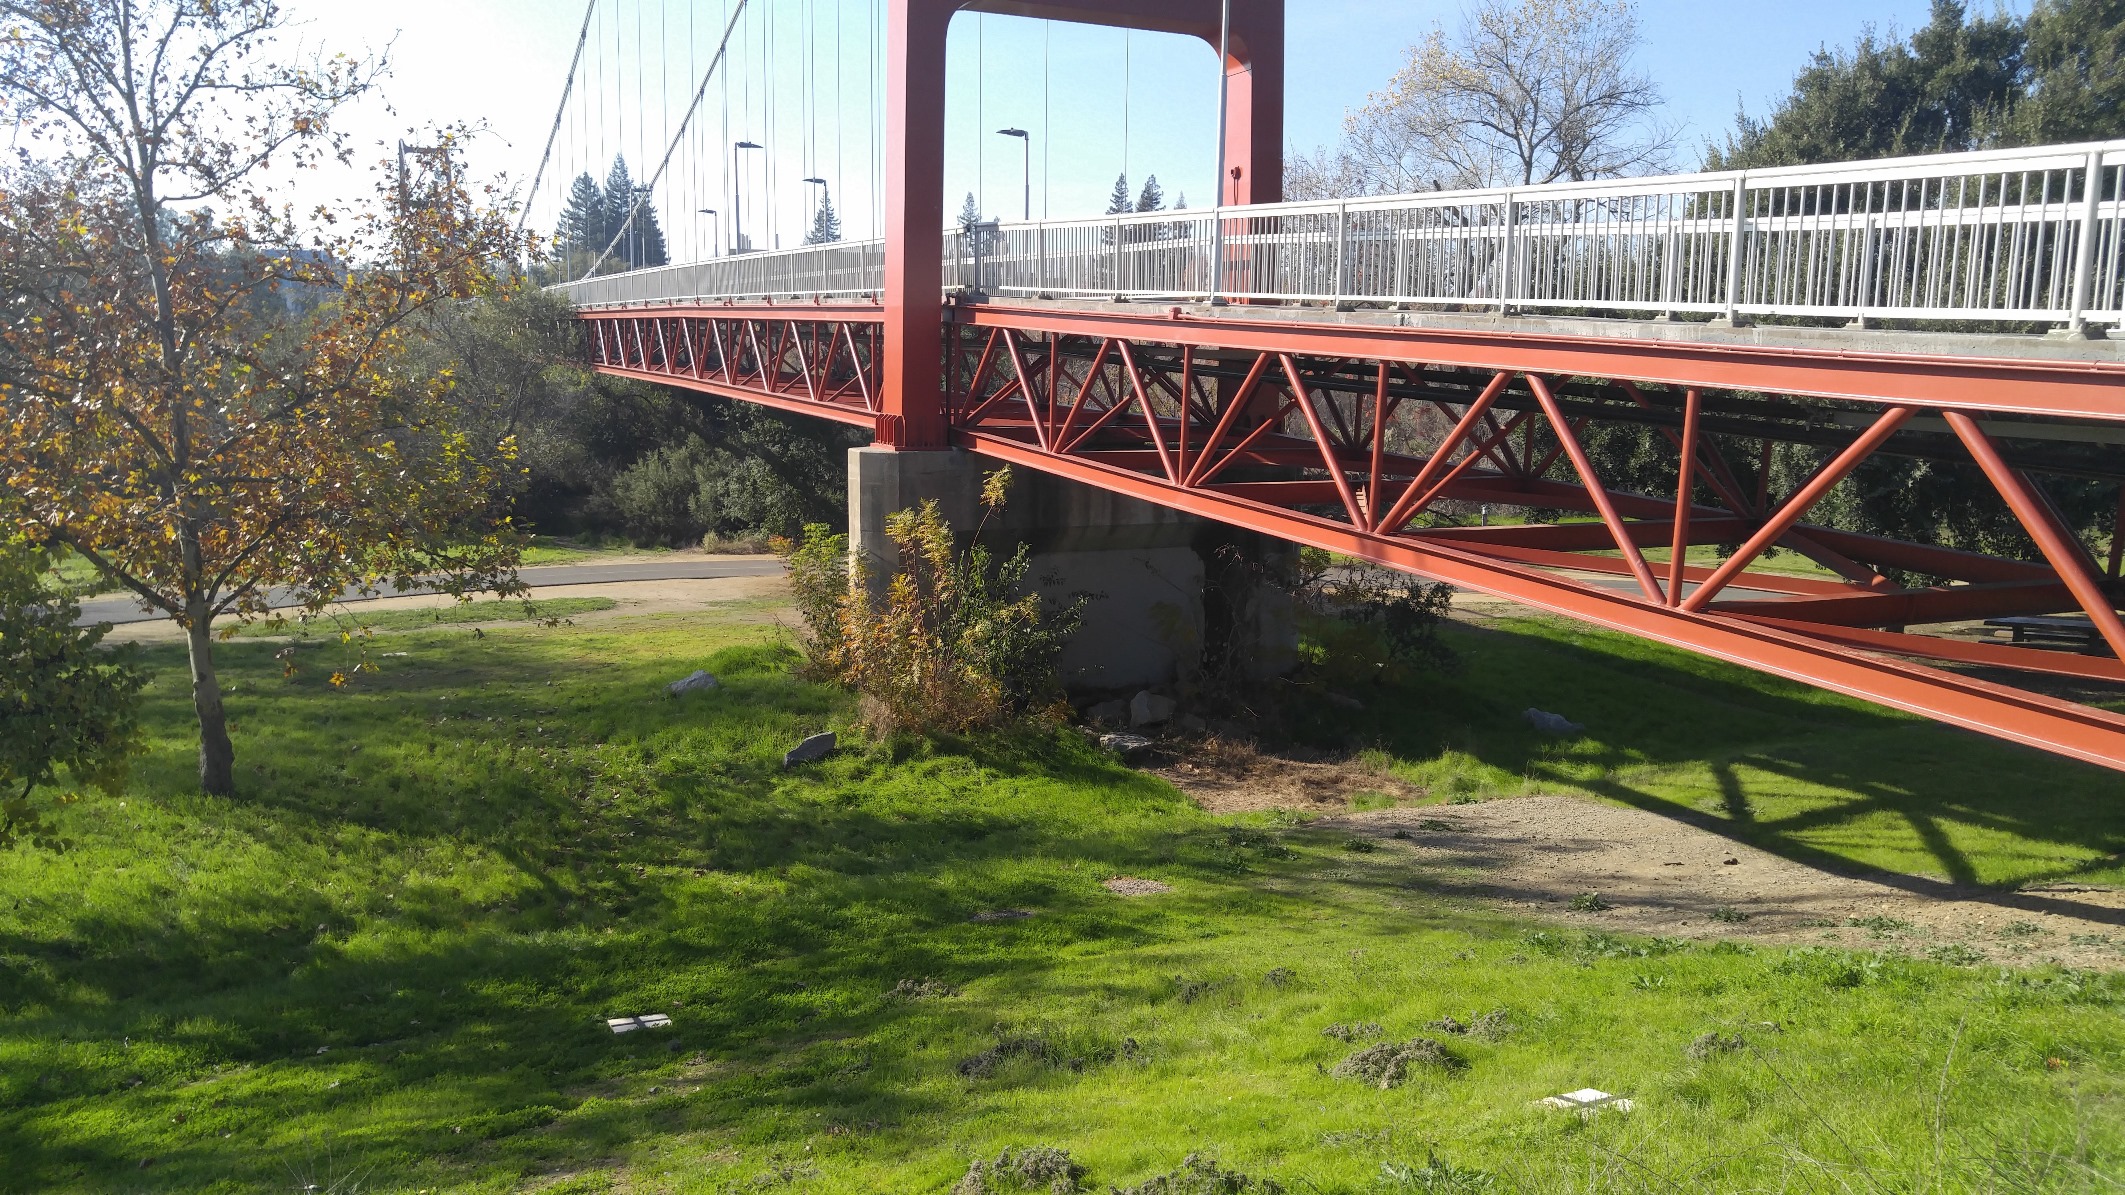 | |
Figure 1. Study area on the east bank of the American River at the Guy West Bridge in Sacramento, CA. |
|
|
| |
|
Methods The data collection process for this project followed the general workflow outlined in the tutorial provided by Agisoft (Agisoft, 2016). Six ground control points were established using an LG V10 to record coordinates for each ground control point. Four of the ground control points were 15" x 13" pieces of plywood with 2" thick black crosses painted on the surface. The other ground control points were distinct features present in the study area (concrete pad and a boulder). Fifty-three overlapping photographs were taken looking southeast from the northeast end of the Guy West Bridge in Sacramento, California on 12/3/2016. All photographs were taken using an LG V10 and its onboard GPS to tag photographs with coordinates. Five of the ground control points were visible in five overlapping photographs, one was only visible in three overlapping photographs. |
|
|
Image Processing Steps in PhotoScan
|
|
|
Results Photoscan was able to create excellent three dimensional models (Figure 6) but the orthorectified image generated from the source images was subpar (Figure 7). The orthophoto was highly distorted and the georeferencing was off by up to 8 meters when checked against base maps in ArcMap and Google Earth. | |
|
Figures and Maps | |
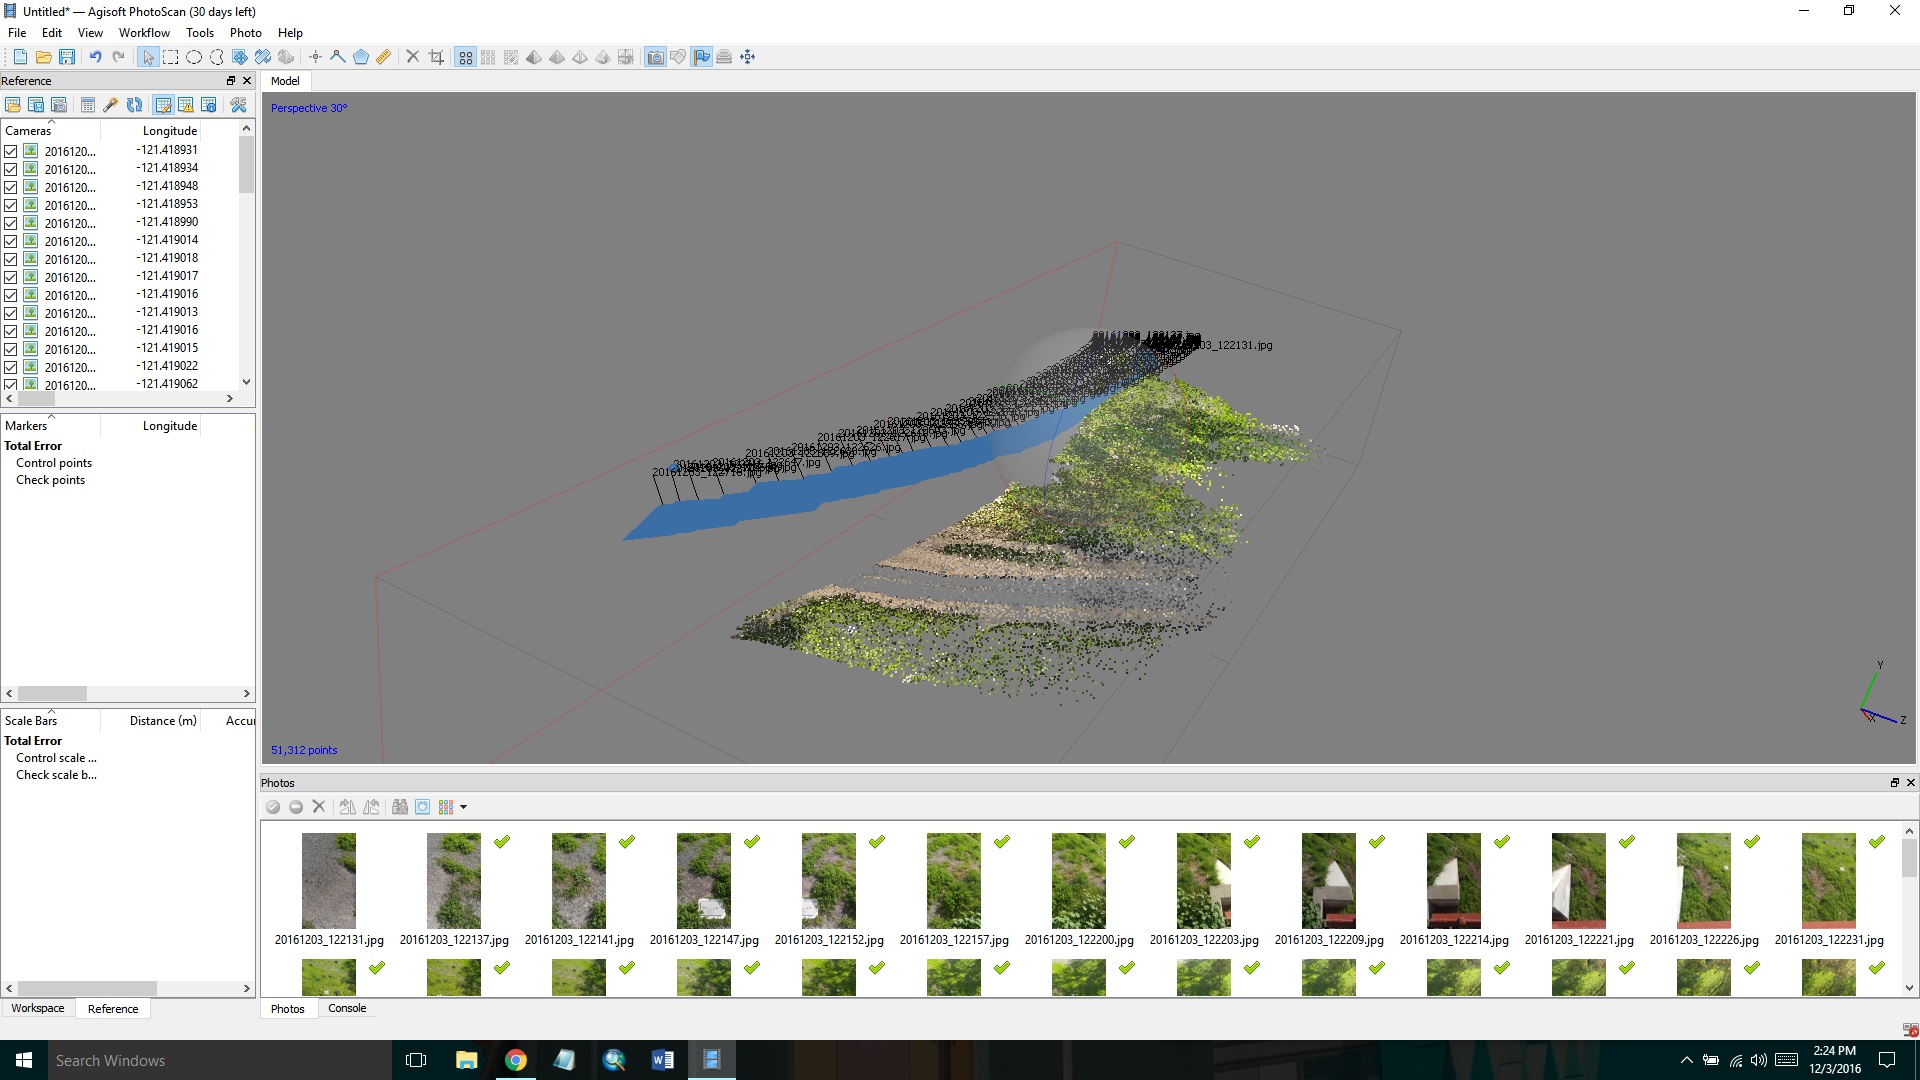 | |
Figure 2. Initial sparse point cloud created after aligning photographs, camera locations shown in blue with black labels. |
|
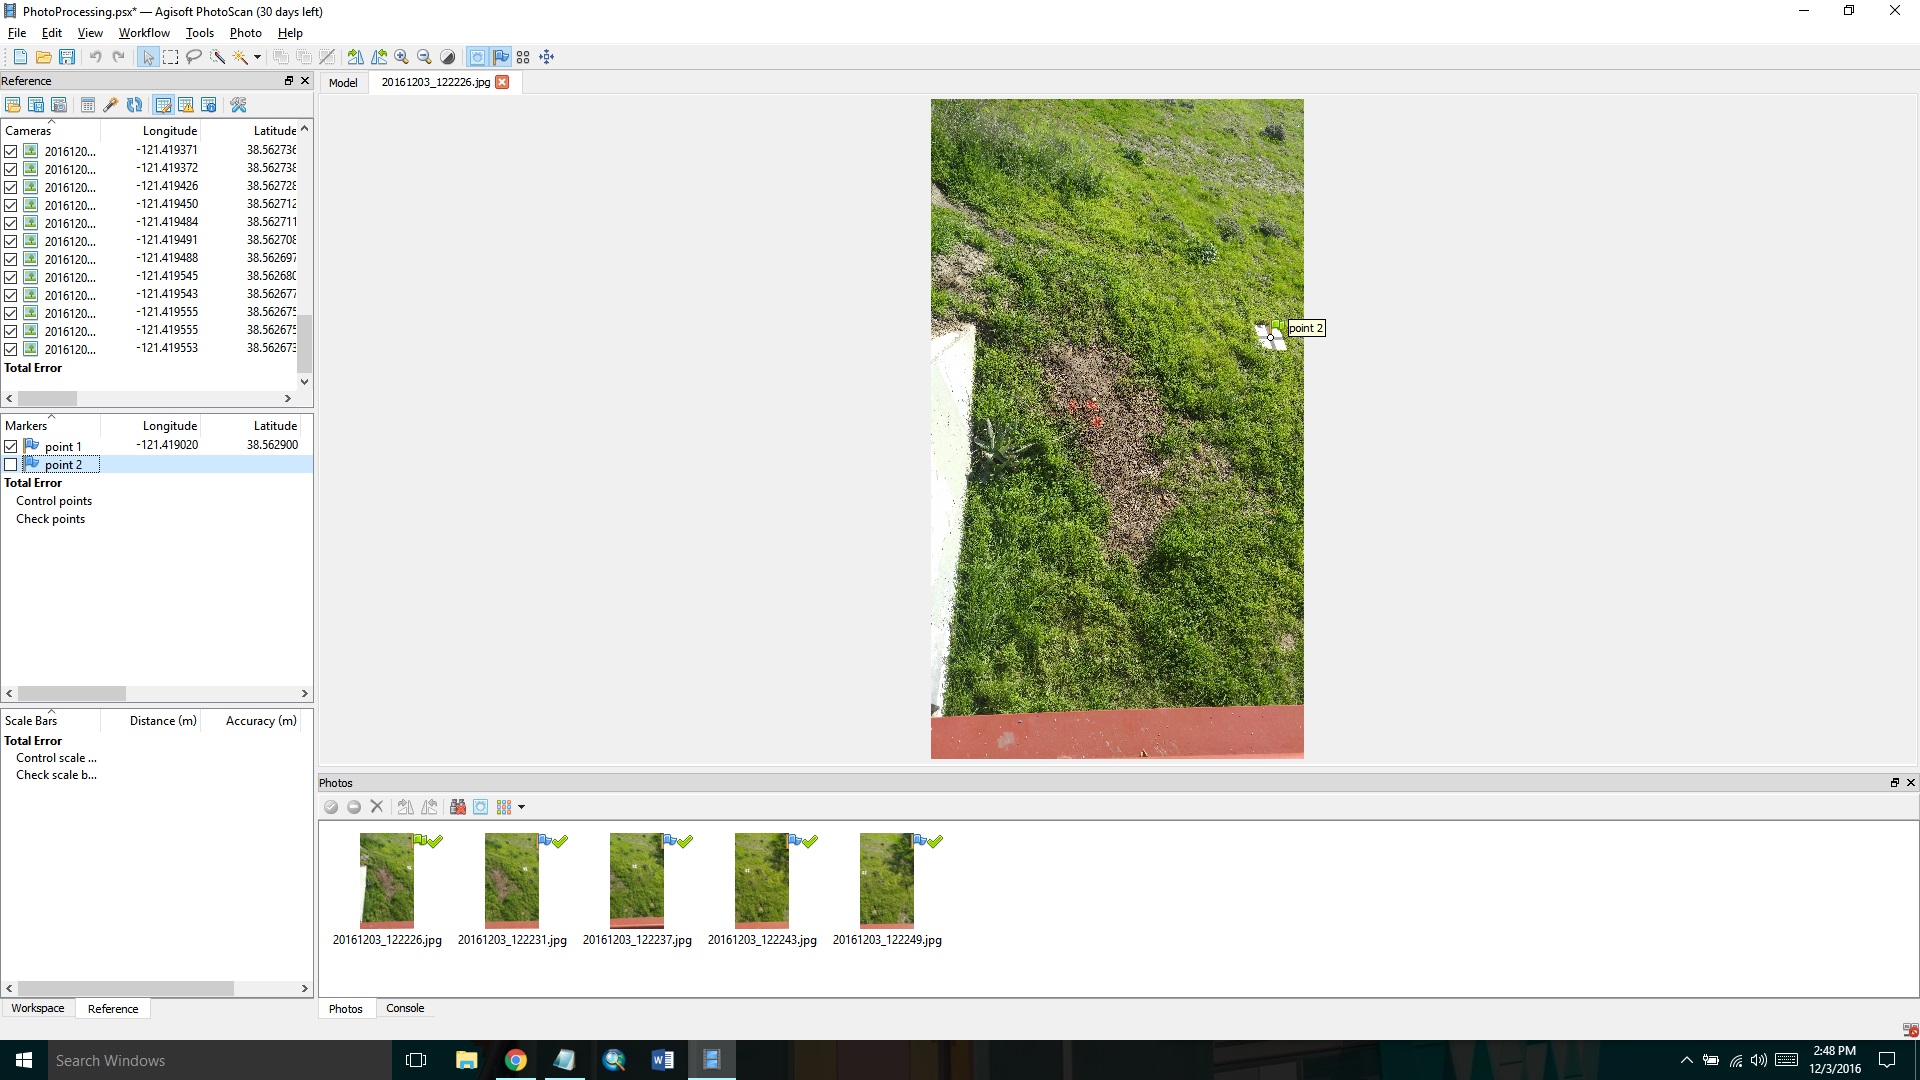 | |
Figure 3. Ground control point creation and editing. Ground control points are manually identified in photos. Default coordinates are replaced with coordinates recorded at the study site using the LG V10's GPS. |
|
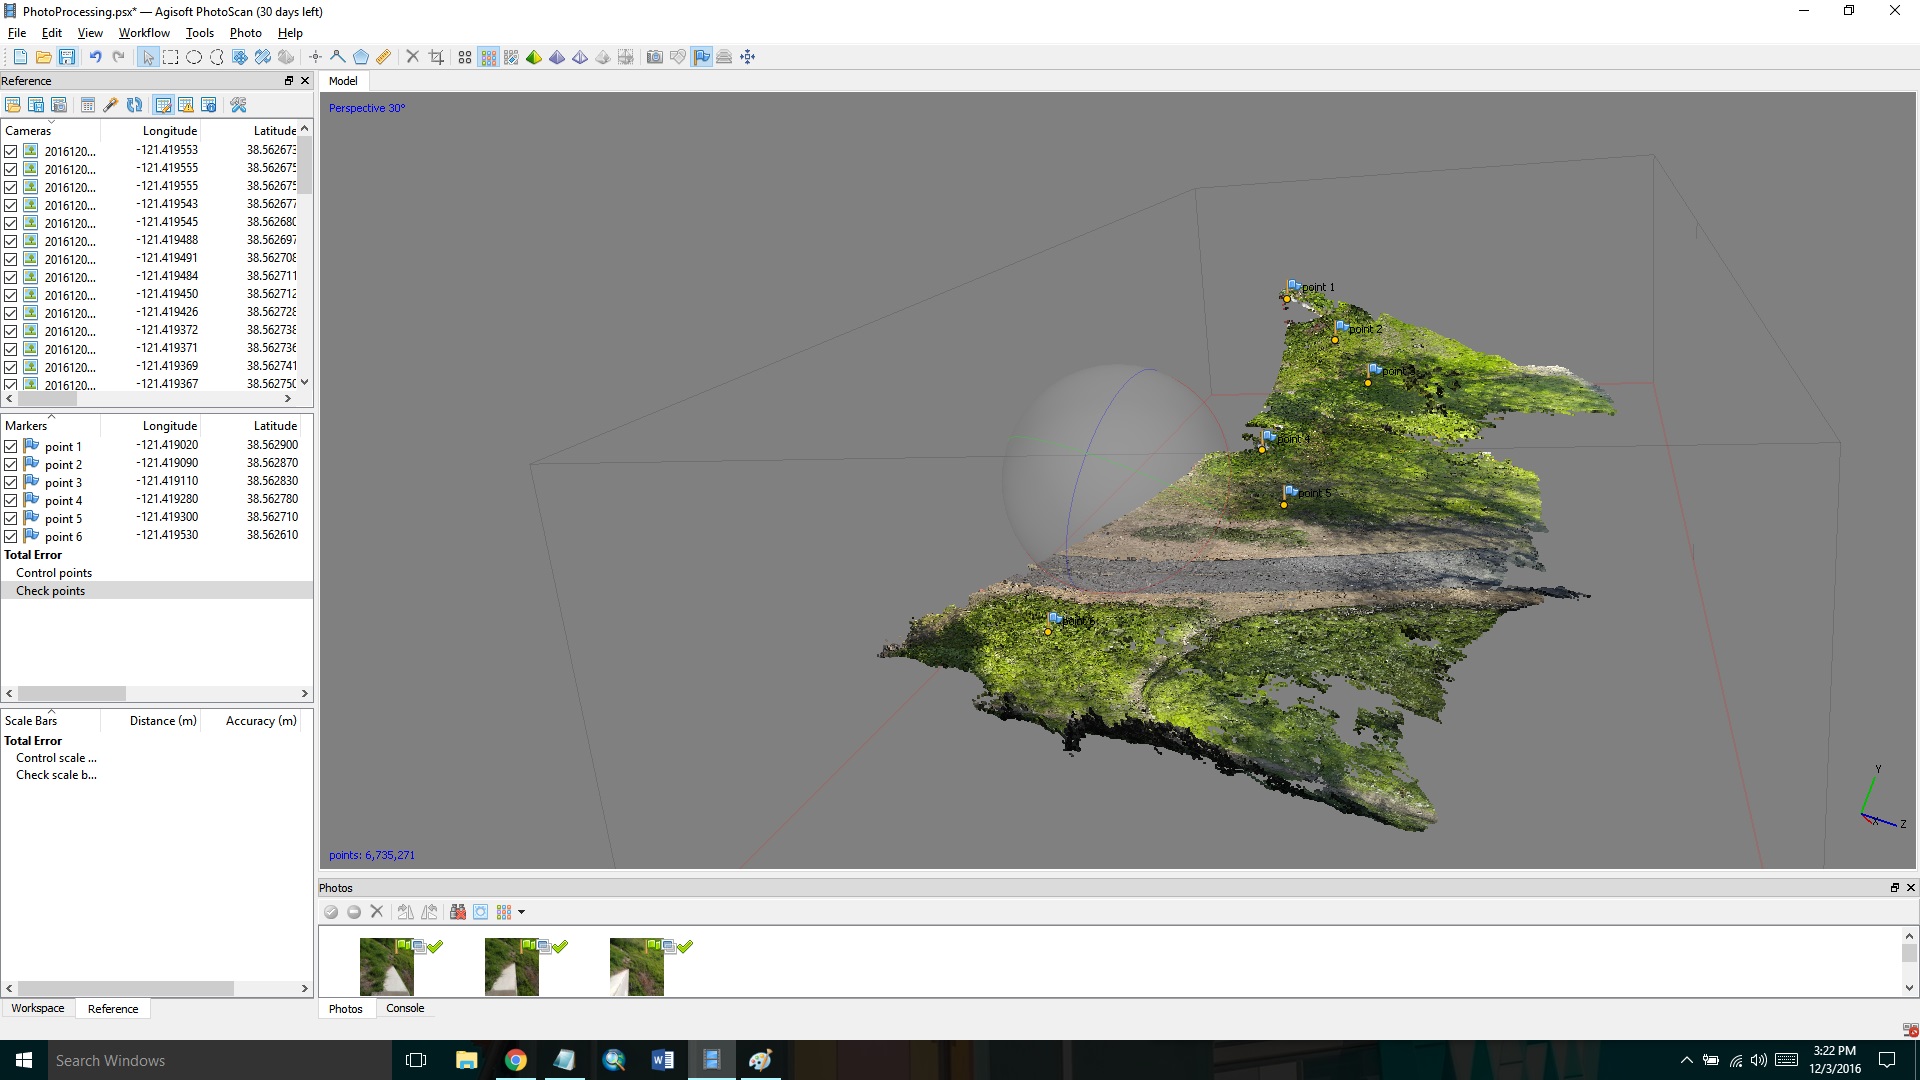 | |
Figure 4. Dense point cloud. |
|
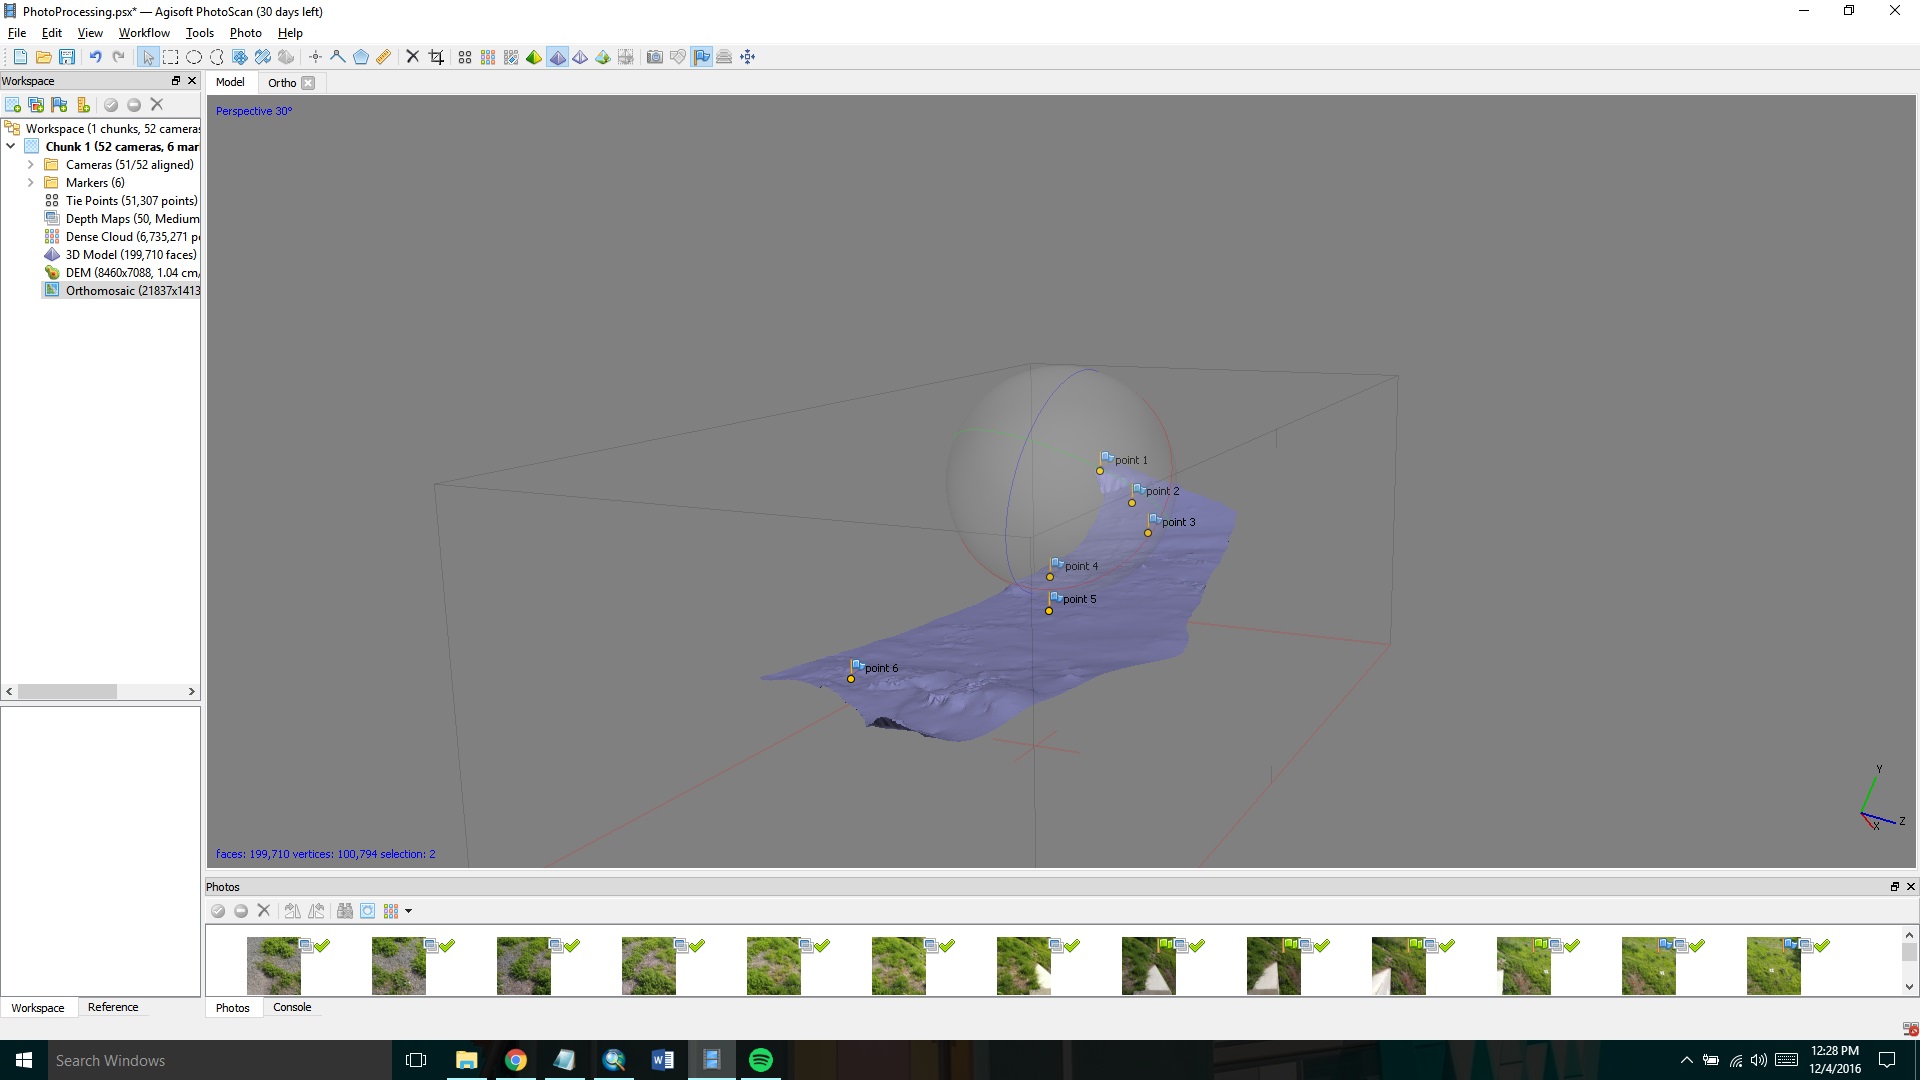 | |
Figure 5. Solid model created from dense point cloud. |
|
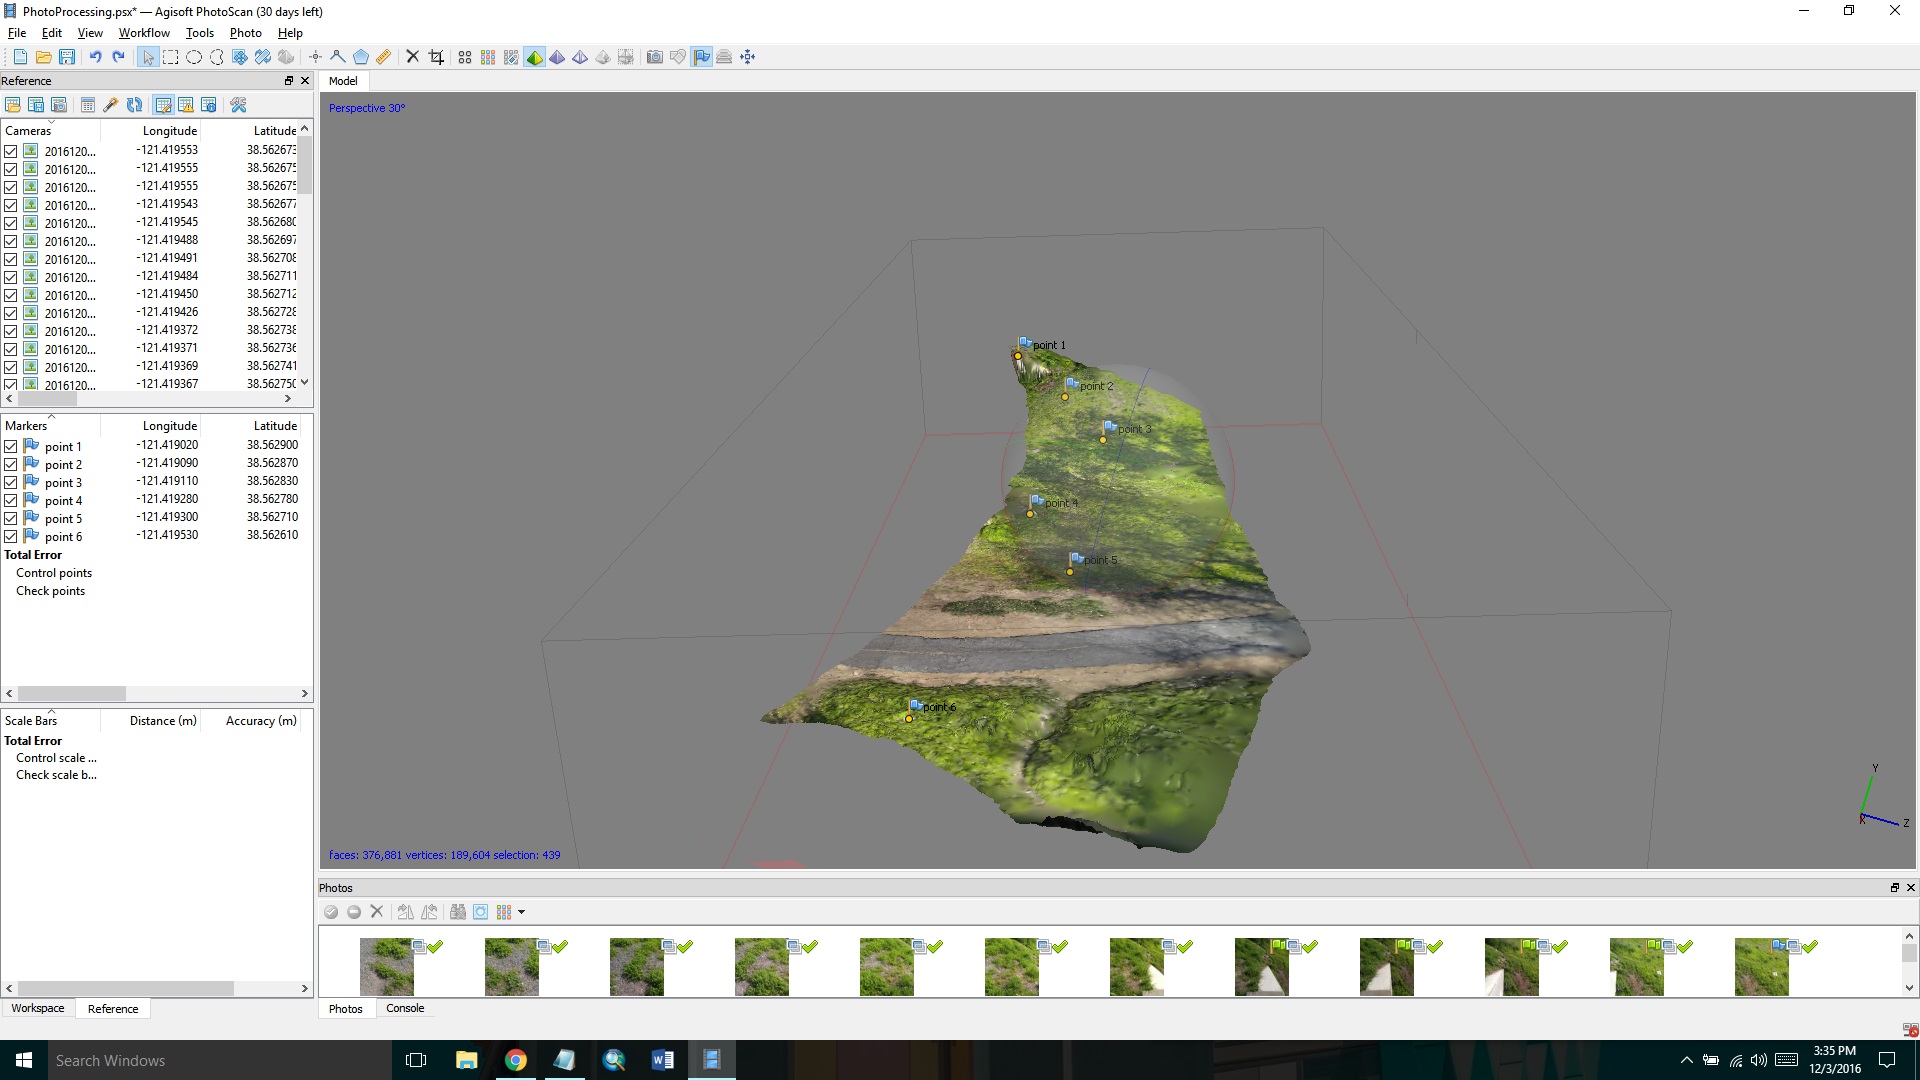 | |
Figure 6. Solid model with textures applied from photographs. |
|
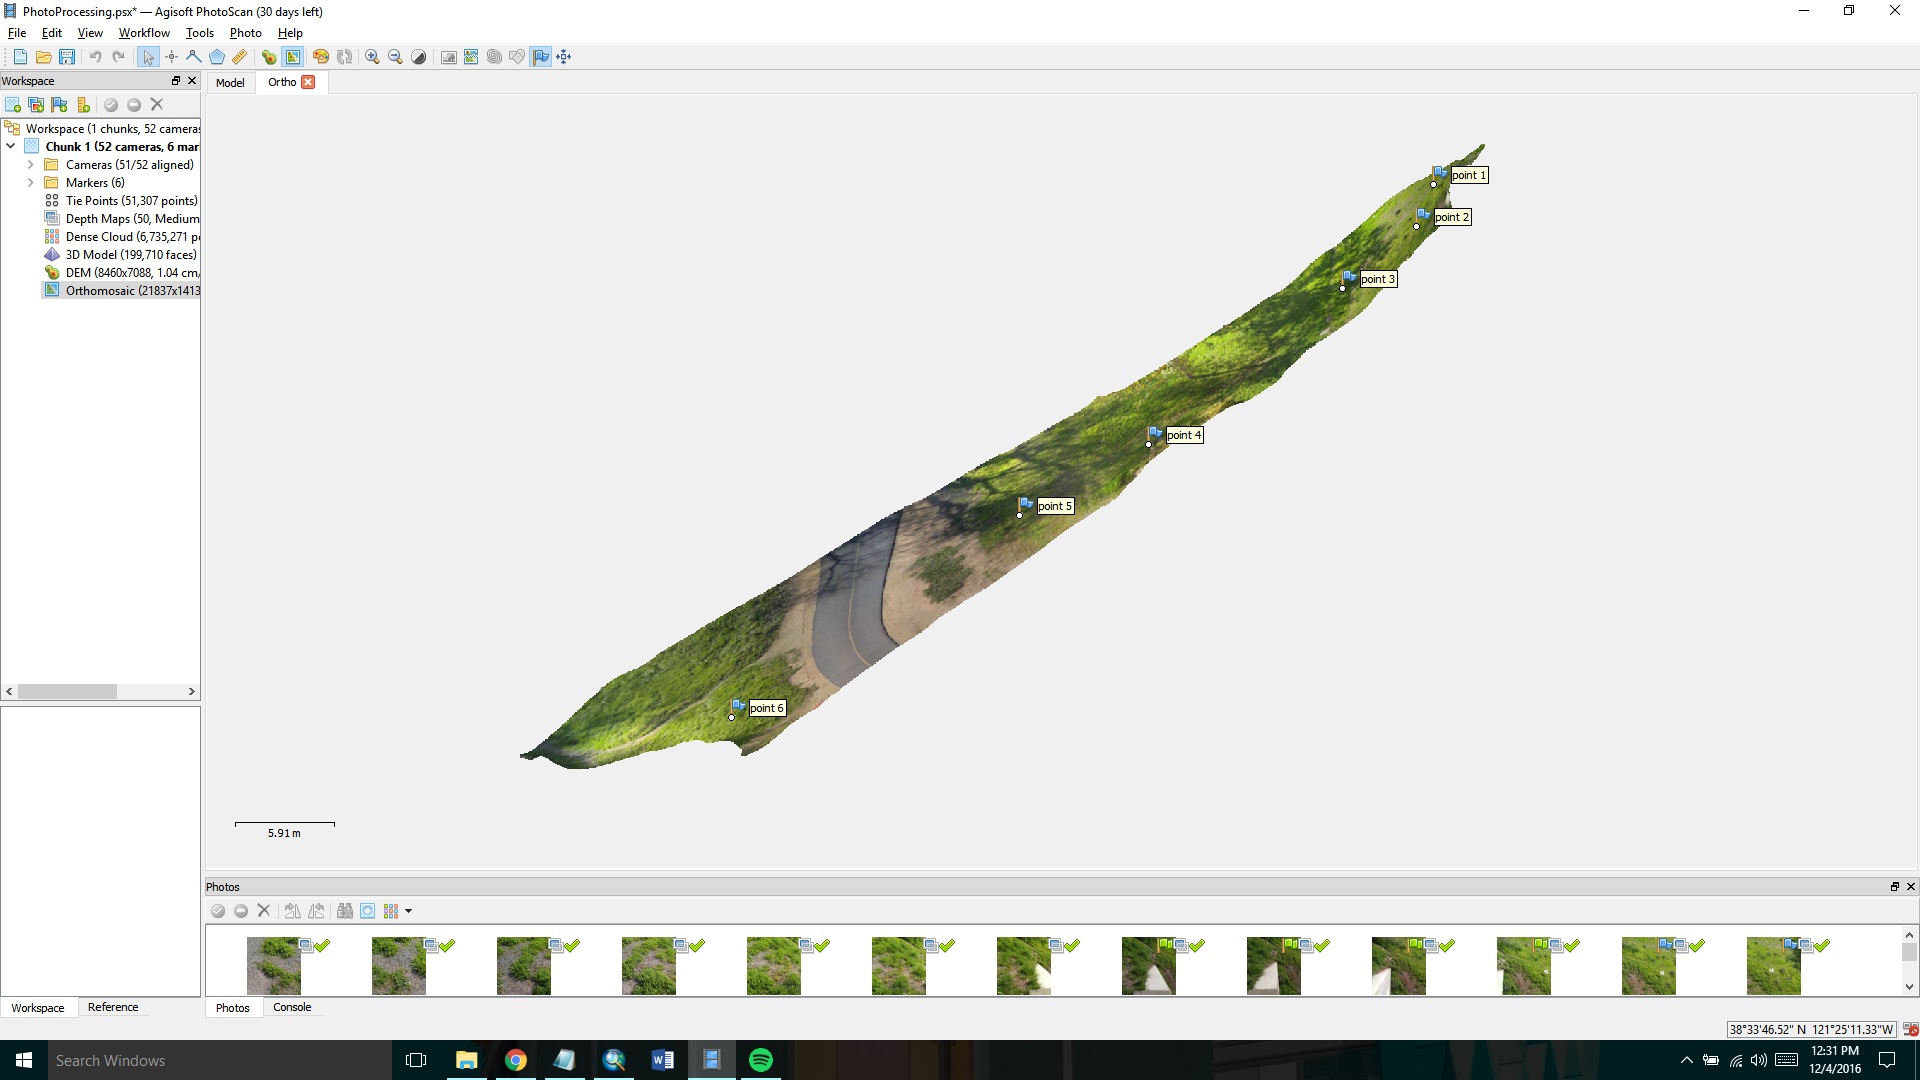 | |
Figure 7. Orthophoto with ground control points labeled as point 1, point 2 etc. |
Analysis The GPS coordinates used for ground control points (cell phone GPS), camera quality, user inexperience with the software, and the lack of additional flight paths are all likely causes for the poor orthophoto results. The cell phone camera uses a very wide angle (4.42mm focal length) lens which produces a distorted image. All photos were taken at a oblique angle off the bridge. Adding additional overlapping flight paths would have improved the model and reduced distortion. |
|
| |
|
Conclusions PhotoScan is an excellent option for creating three dimensional models from overlapping photographs. The quality of the three-dimensional mesh and the textured model exceeded expectations for data captured with a cell phone. Applying an accurate spatial reference to the imagery was difficult due to limitations of the cell phone camera and GPS. Results can be improved by revisiting the study area with a better camera and GPS. | |
|
| |
|
References
Agisoft, 2016. Orthomosaic and DEM generation with Agisoft PhotoScan Pro 1.2 (with ground control points). Agisoft PhotoScan accessed 3 Dec. 2016 http://www.agisoft.com/index.php?id=31 Westoby et al., 2012. 'Structure-from-Motion'photogrammetry: A low-cost, effective tool for geoscience applications. Geomorphology, 179(2012):300-314. | |
|
Appendix Textured Model example | |