| Title American River Parkway Park Locator | |
|
Author Anna SweeneyAmerican River College Geography 350: Data Acquisition in GIS; Fall 2020 | |
|
Abstract A functioning web map application who's primary function is to act
as a "Park Locator" for the American River Parkway located in Sacramento County, California. This application was
created by reading information and following the tutorial for the esri Shortlist Story Map. Html was used to customize
how the information for each individual park would appear to the user. Hyperlinks were coded with html to give the user
access to more information if desired. | |
|
Introduction A need for a simple,
easy to use, and dynamic web map application was demonstrated by a
friend who had searched for an easier way to navigate and gather
information regarding the American River Parkway. The end user was
shown several examples of different kinds of web mapping applications
and story maps, and the shortlist template was chosen. The Parkway is
approximately 24 miles long, from Discovery Park to Nimbus Flat State
Recreation Area. To narrow the scope of the project, 14 parks were
chosen for the application. | |
|
Background Dynamic and easy to use
maps are difficult to find for the American River Parkway. A few paper
maps exist, but all are difficult to decipher, show less detail than
desired, or are not portable. All maps I found are in unconventional
sizes, further displaying the need for a web map application that can
be used on either desktop or on mobile. Examples of existing maps include
the following:
American River Parkway Map (PDF) The American River Parkway Map II (PDF) American River Parkway Foundation Interactive Map | |
|
Methods Background data for the app was gathered
from several sources. Park polygons, river polylines, and road polylines were found
on the Sacramento County Open Data Portal.
World Imagery (for export) was used for the background and is maintained by esri. This layer can be found here.
These layers were left
largely untouched, except for symbolization and popup configuration.The park points were created by downloading the park polygon layer from the Sacramento County Open Data Portal as a file geodatabase. In ArcGIS Pro, the tool “Feature to Point” was used to generate the centroids. Next, a new point feature class was created to align with the shortlist template. Each field and all of it’s properties have to match esri’s example EXACTLY, otherwise the app will not generate later on when the shortlist feature class is imported. Here is the list of all required fields:
“NAME”, “LAT”, and “LONG” were automatically populated when the data was appended from the park centroid feature class. “TAB_NAME” simply determines which “tab” the feature will be filed under. All of my point features were filed under the tab name “Parks” to limit the scope of the project. For “SHORT_DESC”, I chose to reuse the name of the park, but centered the text with: <p style=”text-align:center”>Park Name Here</p> “DESC1” was used to not only display the address of the park, but also utilize the text as a clickable link that directs the user to google maps. This was a method I used as a workaround for routing to avoid using credits. “DESC4” and “DESC5” are formatted the same way and link out to a park map and an American River Parkway map I found, respectively. Here is how that was done: <p><b>Address: </b><a href=”Insert Web Address Here” target=”_blank”>Type Address Here</a></p> The “DESC2” field was used to hold a description for the park. This was limited to a few sentences as the goal for this field was to give the user a small snippet of what the park had to offer. This field was the simplest to fill in: <p><b>Description: </b>Type Description Here</p> “DESC3” was utilized to showcase what the park had to offer in more detail than the “SHORT_DESC” field in the form of bullet points. Effie Yeaw Nature Center is the exception for this field, as the homepage on the American River Parkway website did not have concise information. As a replacement, Effie Yeaw has their hours and fees listed. The bullet point list was constructed using this format: <p><b>Activities: </b><ul><li>First bullet point here</li><li>Second bullet point here</li><li>Third bullet point here</li></ul></p> Both “PIC_URL” and “THUMB_URL” are used to display photos of the features. The photos were gathered from the Sacramento Regional Parks website as well as google and hosted on flickr.com. Photos were used to demonstrate how a photo would appear in the app. Capturing photos of the parks myself was considered out of scope on this project, but will be a future consideration. I was unable to locate trail data for the American River Parkway/Jedediah Smith Memorial trail and I used the following method to generate one rather than digitize a trail in ArcGIS Pro. On All Trails, CSV files can be downloaded even with a free membership. Inside the CSV are hundreds of records with only latitude and longitude. In Pro, this file can be exported as “Table to Point Feature Class” and assigning the X value as Longitude and the Y value as Latitude. Once the points are spatially generated, the tool “Points to Line” was used to generate a line feature class. From this point the trail was uploaded to ArcGIS Online as a feature service. Even though the digital version of the trail is not a perfect representation of the real world, this method saved quite a bit of time. | |
|
Results After configuring, each park within the application has two photos, a
lengthy description, as well as a corresponding pin on the map. The application runs very smoothly on
desktop and all of the links function as they were programmed to. For each park I was able to locate a map
specific to that park. The user may find these maps helpful to plan a day trip, even though these maps can
be considered "basic". | |
|
Figures and Maps
Once the feature services were added to a web map, it can be "shared" as a Short Map Storylist. Since I used html
within the fields when the feature class was in ArcGIS Pro, I chose to import the shortlist feature class as is.
This is the overall result:
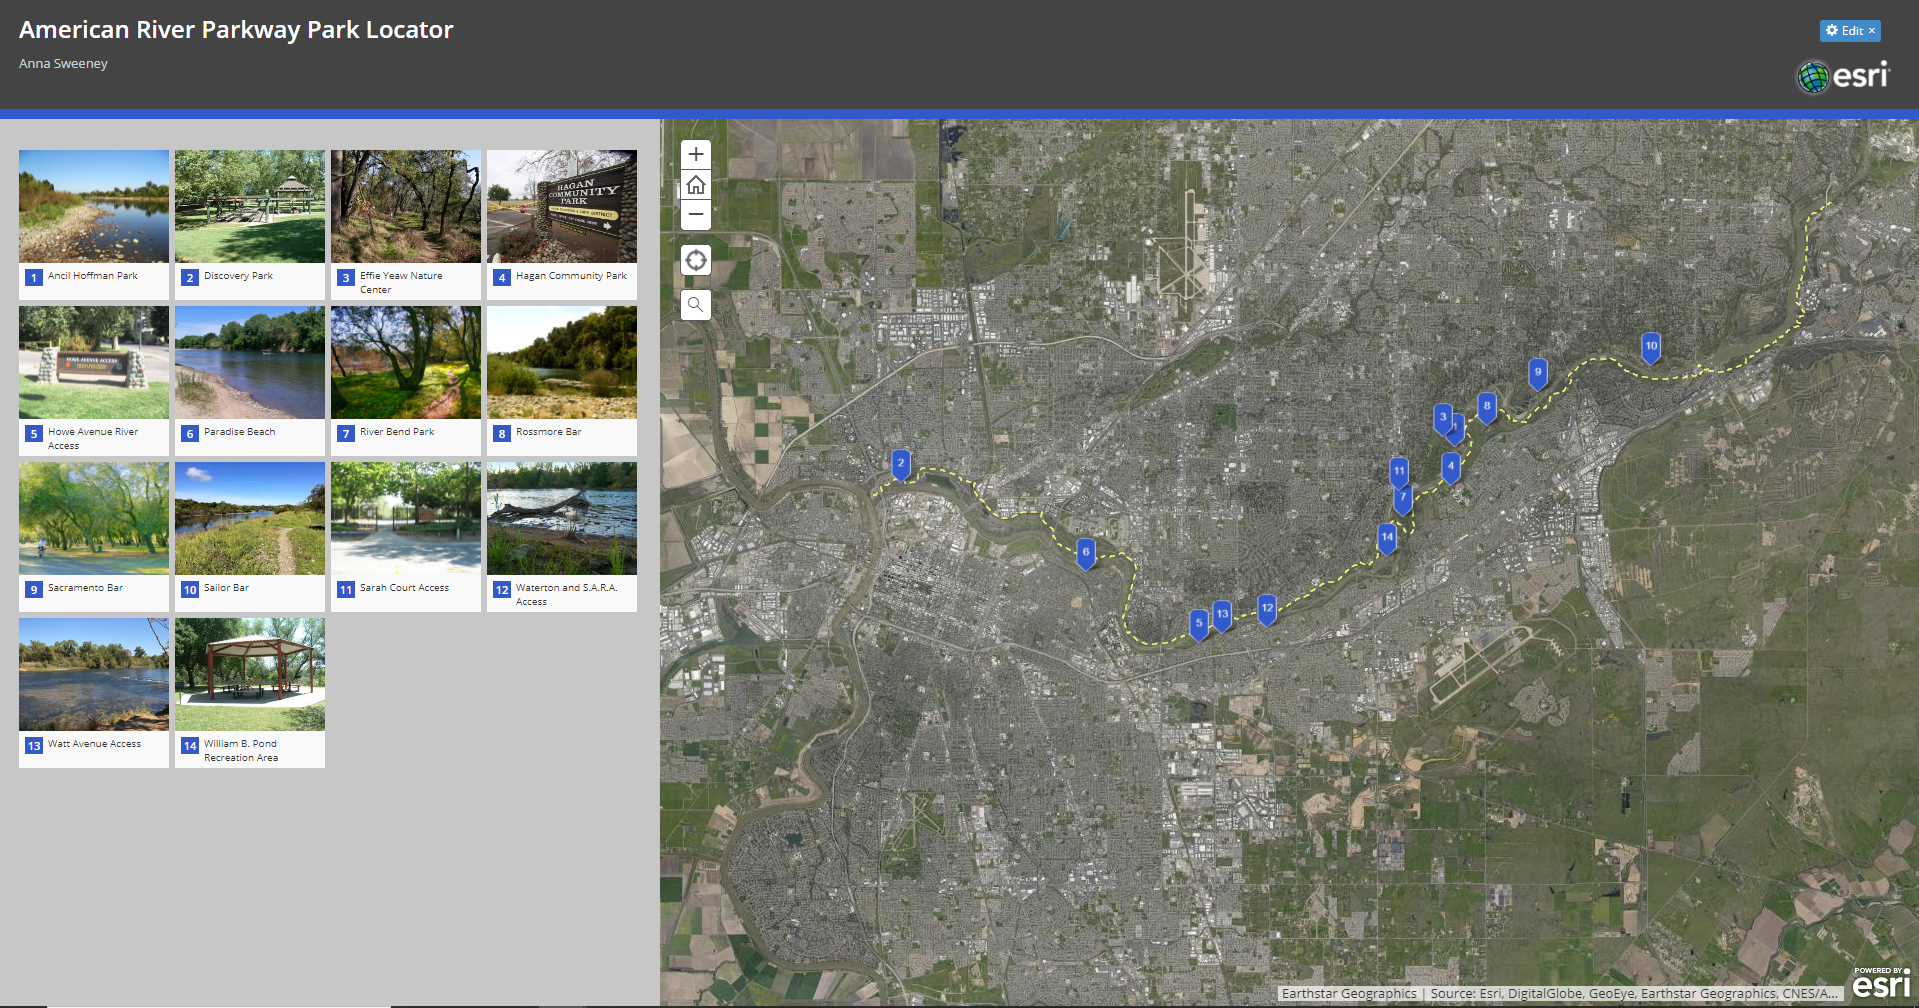
As the user zooms in and out of the map, the parks on the left will disappear and reappear as they become visible within the map extent on the right. Alteratively, a user can click on either the photo of a park on the right or it's corresponding pin on the right and a screen like this will appear: 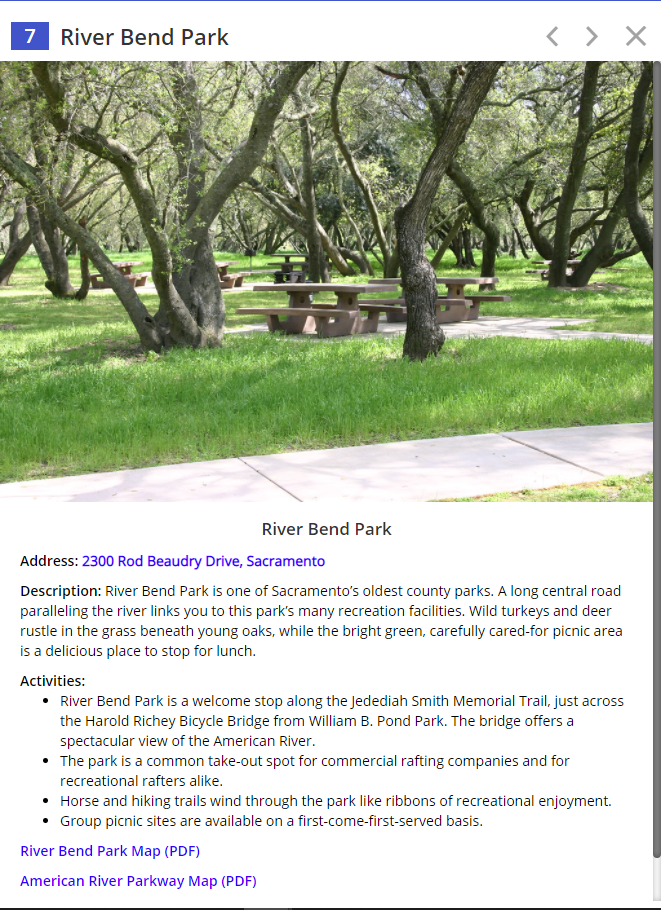 Each line of text highlighted in blue functions as a link to a webpage. As stated above, the address when clicked will direct the user to a google maps page to assist with routing. The "River Bend Park Map (PDF)" will take the user to a PDF map of River Bend Park which was produced by the American River Parkway. Lastly, the "American River Parkway Map (PDF) will guide the user to the overall American River Parkway Map (linked above). The park details do not completely obscure the map when selected. On desktop the app will look like this: 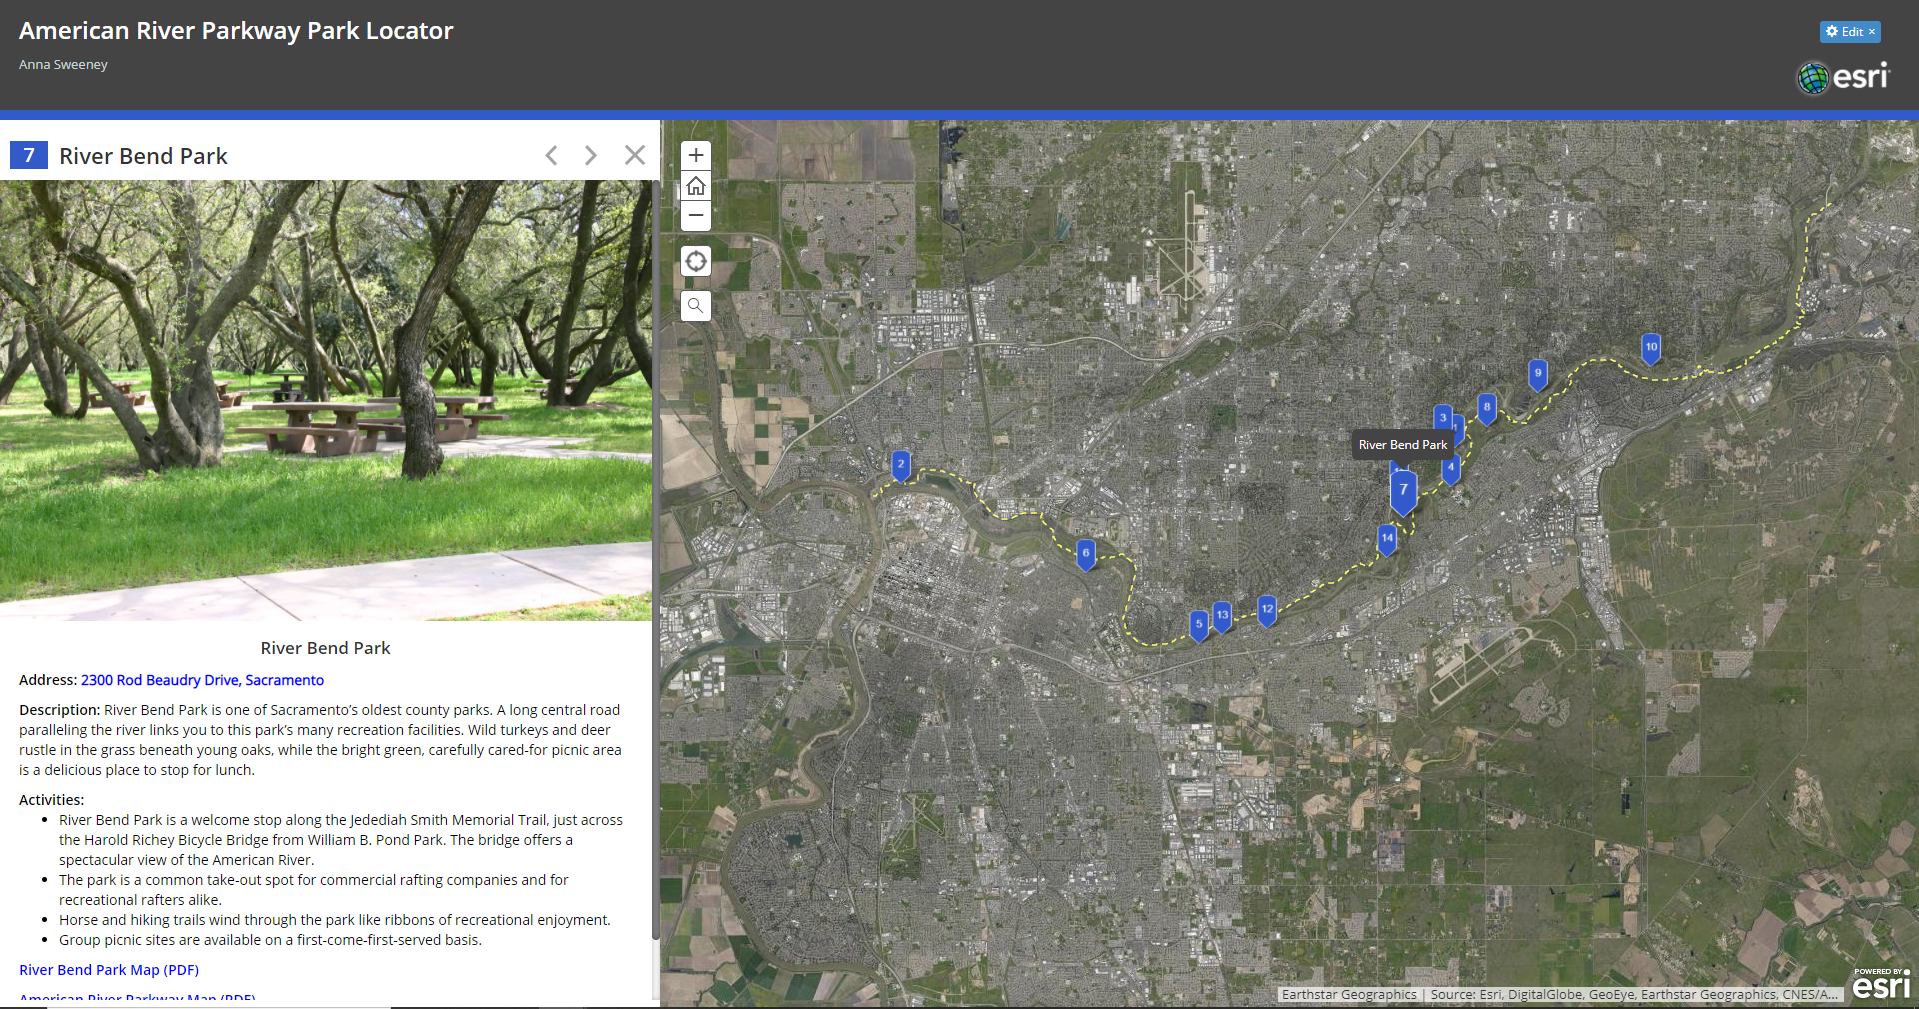
To avoid cluttering the application upon opening, scaling was set for the following layers: parks polygons, roads and rivers. 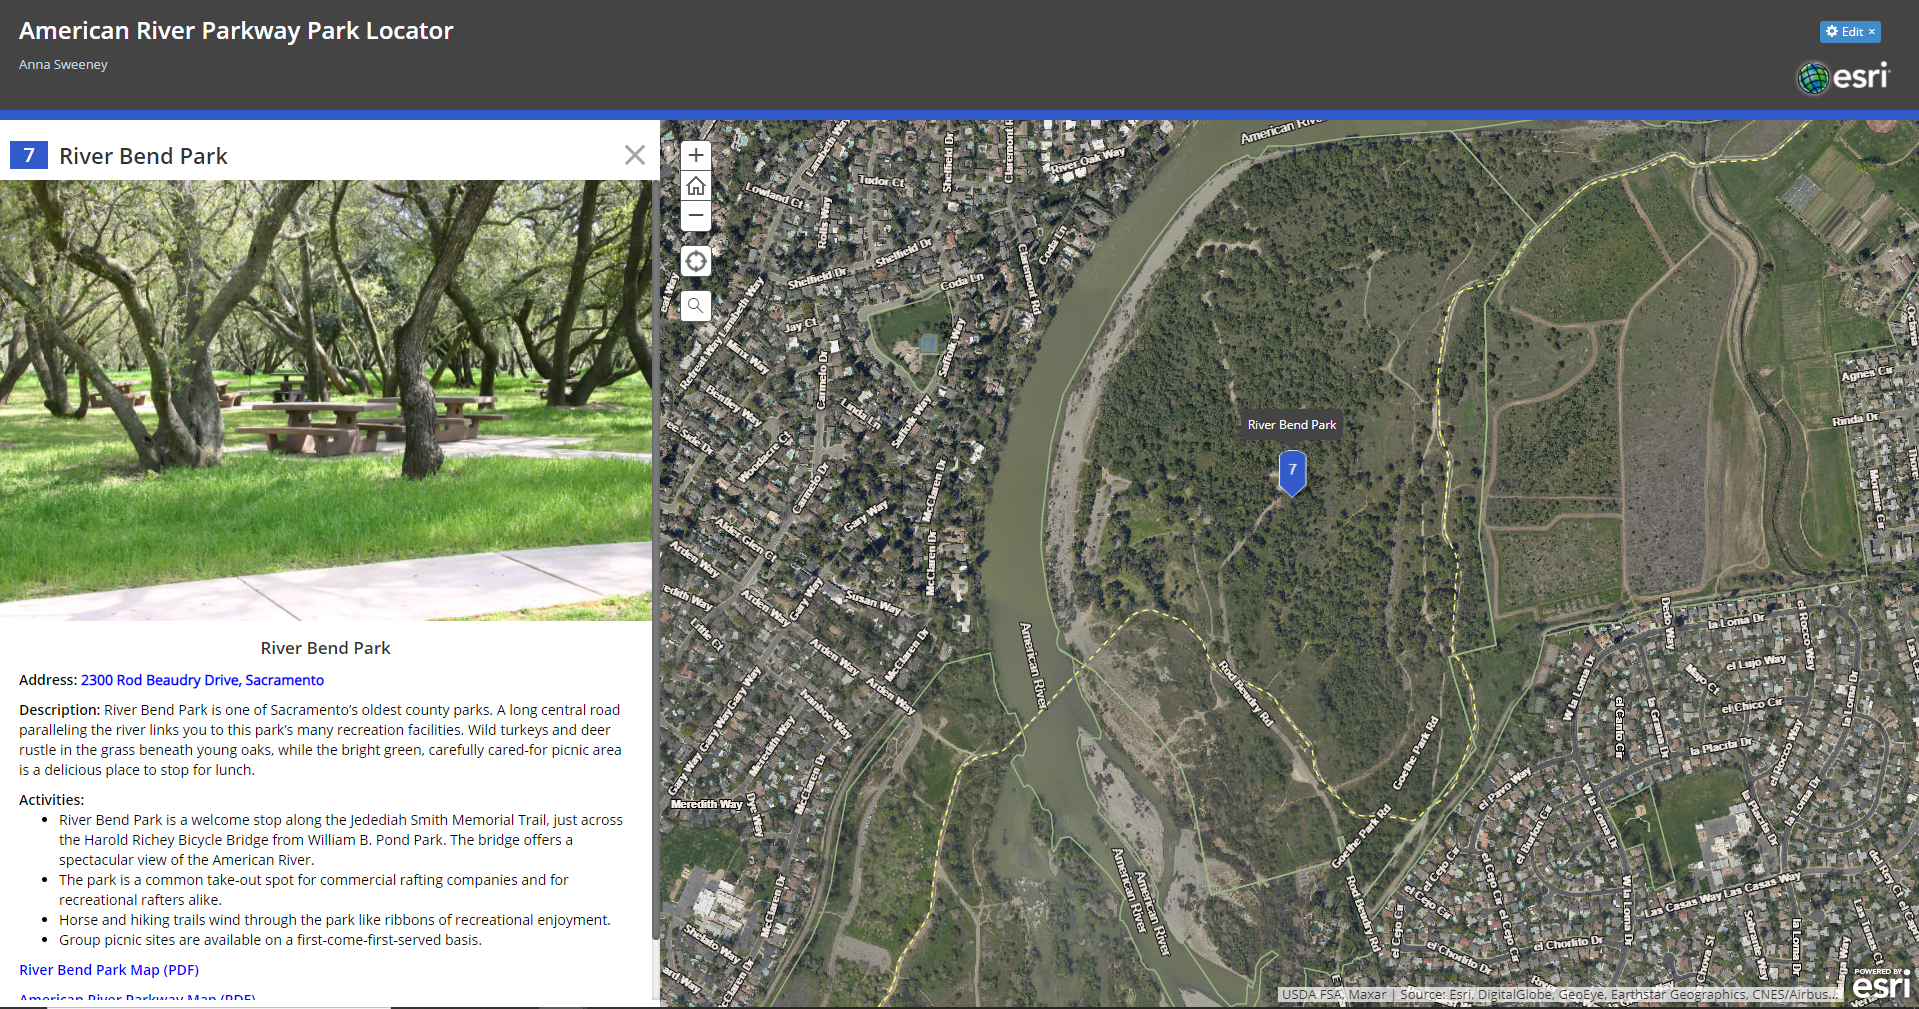
| |
|
Analysis One of the largest challenges for this project was understanding how the Shortlist Story Map
operated as well as trial and error to format the html correctly. The process involved changing small parts of the html, republishing
the shortlist feature service, loading the application, and assessing which areas needed ammending. Another challenge is learning how
to use the labelling on AGOL to align with my preferences. Unlike ArcMap or ArcGIS Pro, labelling in ArcGIS Online is very limited
and largely out of our control. A workaround may be possible by downloading the feature layers from ArcGIS Online as a file geodatabase,
opening the feature class in ArcGIS Pro, and using the Maplex Label Engine to customize labels. After customizing the feature class can
be republished as a feature service and the labels may be retained.
I discovered towards the end of the project the Shortlist Story Map only allows one point feature service to be used within the application at one time. One of my goals was to incorporate data I had collected along the parkway using Survey123 and display features like water fountains, benches, trail access points, parking lots, etc as background reference information. As a result, I chose to leave this information out of the application and revisit this limitation in the future. | |
|
Conclusions For the future, there are a few things I would like to accomplish for this application.
Firstly, I would like to add more parks to the "Parks" tab as well as create more tabs. For example, I would like to have a tab for
restrooms, another for picnic areas, trails, dog parks, etc. Each park that has the corresponding ammenity would be added as a point
feature within the shortlist feature class. Each field for each record will require html modifications to retain the theme of the Parks
tab. Once the additions are complete, the feature class can be republished as a feature service and the application will update when refreshed. | |