Assignments
and exercises:
home
Please refer to reader!!!
Homework Photoshop Assignment No1
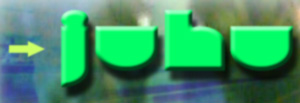
Create a banner / logo for your index page:
Now you can start to create images for your site,
like buttons, logos, thumbnails and more.
The first image you are going to create is a banner
or logo that somehow gives a clue about your identity.
It doesn't have to hold your real name or can just contain
a design, like a logo.
Create a logo/name image for your index page:
- Make the
image size 700 x 300 - 200 pixels
(the height depends a little bit on your design)
- work in
RGB mode
- integrate
photographic imagery by selecting parts
in other images and pasting them into your file.
example:
back
to table of contents
Homework
Photoshop Assignment No2
Create and
compress images to use in an HTML site:
- main image
- four buttons:
portfolio.gif, resume.gif, contact.gif
Save all images
into an image folder in your HTML folder as psd files.
Then save them for the web as gifs or jpgs into the images folder in the myweb
folder.
Open your index page in Simple text and insert the images into the table.
example
I left some space and visible borders around the cells to demonstrate
how the table holds all the images we created.
back
to table of contents
Exercise
No1
Create your
name logo
- Create a
file of 450 x 250 pixels
- Save the
file as name-logo.psd into your Photoshop folder.
- Choose a
background color
- Use only
painting and selection tools and use them all:
marquee tool, paint brush, pencil, airbrush, lasso tool, bucket
- Use only
one layer
- No type
or shape tools
back
to table of contents
Exercise
No2
This exercise
is mainly about working with layers and not so much about colors and design.
Pay attention to the layers palette and make
sure to complete listed steps below.
- Open a new file of 550
x 450 pixels
- Name it layers.psd
and save it into your photoshop folder
- Insert layers
- Name Layers
- Link 2 of them and move
layer content in the file window.
- Hide one layer
- Unlock the background
layer.
- Delete a Layer.
- Move lower layer on top.
back
to table of contents
Exercise
No3
Choose at
least two photographic images and create a photocollage
using layers and selection tools
- Open a new file of 550
x 450 pixels
- Name it photo-collage.psd
- Open two photographic
images
- Select, copy and paste
parts of the images into several layers of the new document
Do the following while you
create your image:
- Insert layers
- Name Layers
- Link 2 of them and move
layer content in the file window.
- Hide one layer
- Unlock the background
layer.
- Delete a Layer.
- Move lower layer on top.
back
to table of contents
Exercise
No 4
Image size/ canvas size
Open an image
Go to Image/Image Size
Insert smaller
numbers under Pixel Dimensions.
Click ok
What happens?
Open the History palette (go
to Windows/Show History)
Select the initial state when
you opened the image.
Go to Image/Canvas Size and
modify the size.
What happens?
What's the difference?
back
to table of contents
Exercise
No 5
Filters
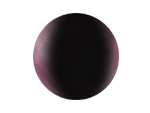
soloplanet.psd |
+ |
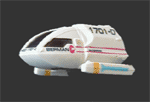
spaceship.psd
|
= |
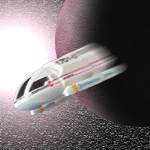
deepspace.psd |
Open following images for
this exercise:
- soloplanet.psd
- spaceship.psd
- Open a New File: File/New
- Size: 400 x 400 px
- Name: deepspace.psd (make
sure under format you choose Photoshop.)
- Save into your Photoshopfolder
in your name folder.
- Choose the bucket tool
- Click the color icons and
choose black in the color picker
- Color the background of
deepspace.psd black.
- Go to Filter/Texturizer
and choose Sandstone
- Move the handles and click
ok when the preview looks good to you.
- Activate the open file
soloplanet.psd
- Choose the move tool and
drag the planet directly into the deepspace file.
- See that it is on it's
own layer? (Window/show layers)
- Activate the spaceship
file and select the black background using
the magic wand selection tool (first section of the tool box).
- Go to Select/Inverse
- See that now the ship is
selected?
- Go to Edit./Copy
- Activate the deepspace
file and paste the ship into it (Edit/Paste)
- In the layers palette name
all your layers but the background layer.
- Copy the layer that contains
the spaceship.
- Select the layer copy in
the layers palette (turns blue)
- Go to Filter/Blur/Motion
blur and move the handle to 80.
- Select the layer spaceship
- Go to Filter/Blur/Motion
blur and move the handle to 2.
- The layer spaceship needs
to be on top of the layer copy spaceship.
- If spaceship is still selected
move the ship so that the blurred copy shows in the back.
- In the layers palette link
the spaceship and spaceship copy.
- Go to Edit/Transform/Rotate
and turn the ship(s) as if they fly down.
- Select the background layer
and go to Filter/Render/Lens flare.
- Choose a brightness and
position.
Now your deepspace file should
look similar to the file shown above.
back
to table of contents
Exercise
No 6
Vector tools
and vector layers
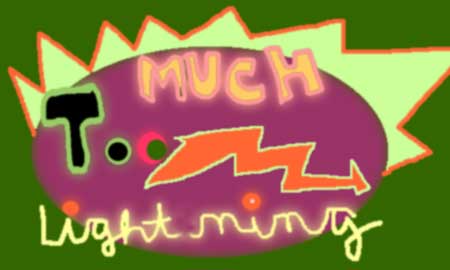
Create an image that contains
only text and shape layers.
Use only the tools located in the vector section of the toolbox.
New File: 500 x 250 px
Name:vector.psd
Safe: into your Photoshop
folder
back
to table of contents